Step 7 - Add Terrain
In this step, we'll add terrain to your map using a hillshade effect. This will give your map a 3D appearance and help users understand the topography of Waiheke Island.
Creating a Hillshade
We'll create a hillshade using raster digital elevation model (DEM) tiles styled from the stylesheet to create the appearance of terrain.
Download Terrain Tiles
We'll download raster DEM tiles for the same bounding box we used for Protomaps:
-
Download Mapterhorn tiles: Use the PMTiles CLI to extract raster-dem tiles:
pmtiles extract \ --minzoom=10 \ --maxzoom=16 \ --bbox=174.8,-37.0,175.2,-36.7 \ https://download.mapterhorn.com/planet.pmtiles \ sources/waiheke_island_terrain.pmtilesNote: Mapterhorn is a recent effort to update the quality and coverage of global terrain tiles. The work is ongoing — if you have a business interest in high resolution terrain data for visualization, please reach out!
-
Wait for download: This may take several minutes depending on your connection.
Update Your Stylesheet
Now we'll add the terrain layers to your style.json. You can do this through Maputnik (as in Step 6) or by editing style.json directly — both approaches work. If you use Maputnik, remember to go through the same export/save process from Step 6 to get the updated stylesheet back into your repository.
-
Add the terrain source to your
sourcessection instyle.json:"sources": { "te-ara-hura": { ... }, "protomaps": { ... }, "terrain": { "type": "raster-dem", "url": "pmtiles://sources/waiheke_island_terrain.pmtiles", "tileSize": 256, "encoding": "terrarium", "attribution": "<a href=\"https://mapterhorn.com/attribution\">Mapterhorn</a>" } } -
Add the hillshade layer to your layers list. This should go after the
earthlayer but before thelandcoverlayer so it appears underneath:{ "id": "hillshade", "type": "hillshade", "source": "terrain", "paint": { "hillshade-accent-color": "hsla(0, 0%, 0%, 0.1)", "hillshade-exaggeration": 0.5, "hillshade-highlight-color": "hsla(0, 0%, 100%, 0.1)", "hillshade-illumination-direction": 315, "hillshade-shadow-color": "hsla(0, 0%, 0%, 0.5)" } }Here is an explanation of these properties:
hillshade-exaggeration: Controls how dramatic the terrain looks (0.0 to 1.0)hillshade-illumination-direction: Direction of the light source, measured in degrees from north (0–359)hillshade-shadow-color: Color applied to shadowed areashillshade-highlight-color: Color applied to illuminated (raised) areashillshade-accent-color: Additional color layer for accentuating terrain features and improving overall hillshade clarity
Test Your Map
-
Make sure your server is still running. If not, run
caddy runin the terminal. -
Do a hard refresh in your browser — a regular refresh may not reload the new terrain tiles:
- Mac:
Cmd + Shift + R - Windows/Linux:
Ctrl + Shift + R
- Mac:
-
Go to your map:
- Local:
http://127.0.0.1:1234/index.html - Codespaces: use your forwarded URL (e.g.,
https://xxxxx-1234.preview.app.github.dev/index.html)
- Local:
-
You should see:
- The Protomaps basemap
- Terrain showing the topography underneath the landcover
- Te Ara Hura displayed on top
Troubleshooting
Terrain doesn't show?
- Try a hard refresh (
Cmd/Ctrl + Shift + R) — the terrain tiles may be cached - Check that
sources/waiheke_island_terrain.pmtilesexists - Verify the terrain source is correctly defined in
style.json - Check the browser console (F12) for errors
- Make sure the terrain source URL uses the
pmtiles://protocol
Commit Your Changes
Add, commit, and push your revised style.json to your remote fork.
Verify that the map you see via your server (local or Codespaces) and the one you see via GitHub Pages match the image below.
What You Have Now
At the end of this step, you should have:
sources/waiheke_island_terrain.pmtiles— Terrain elevation data- Hillshade layer displaying terrain shading
Your map now shows the beautiful topography of Waiheke Island!
Want to take this further?
These style edits are just the beginning. If you want to keep polishing, here are some challenges:
- Add transparency to the landcover so you can see the terrain through it
- Refine the Te Ara Hura styling by changing the color or the line width across zoom levels
- Refine the terrain styling by modifying the shadow and highlight colors or the exaggeration value
Your Map Preview
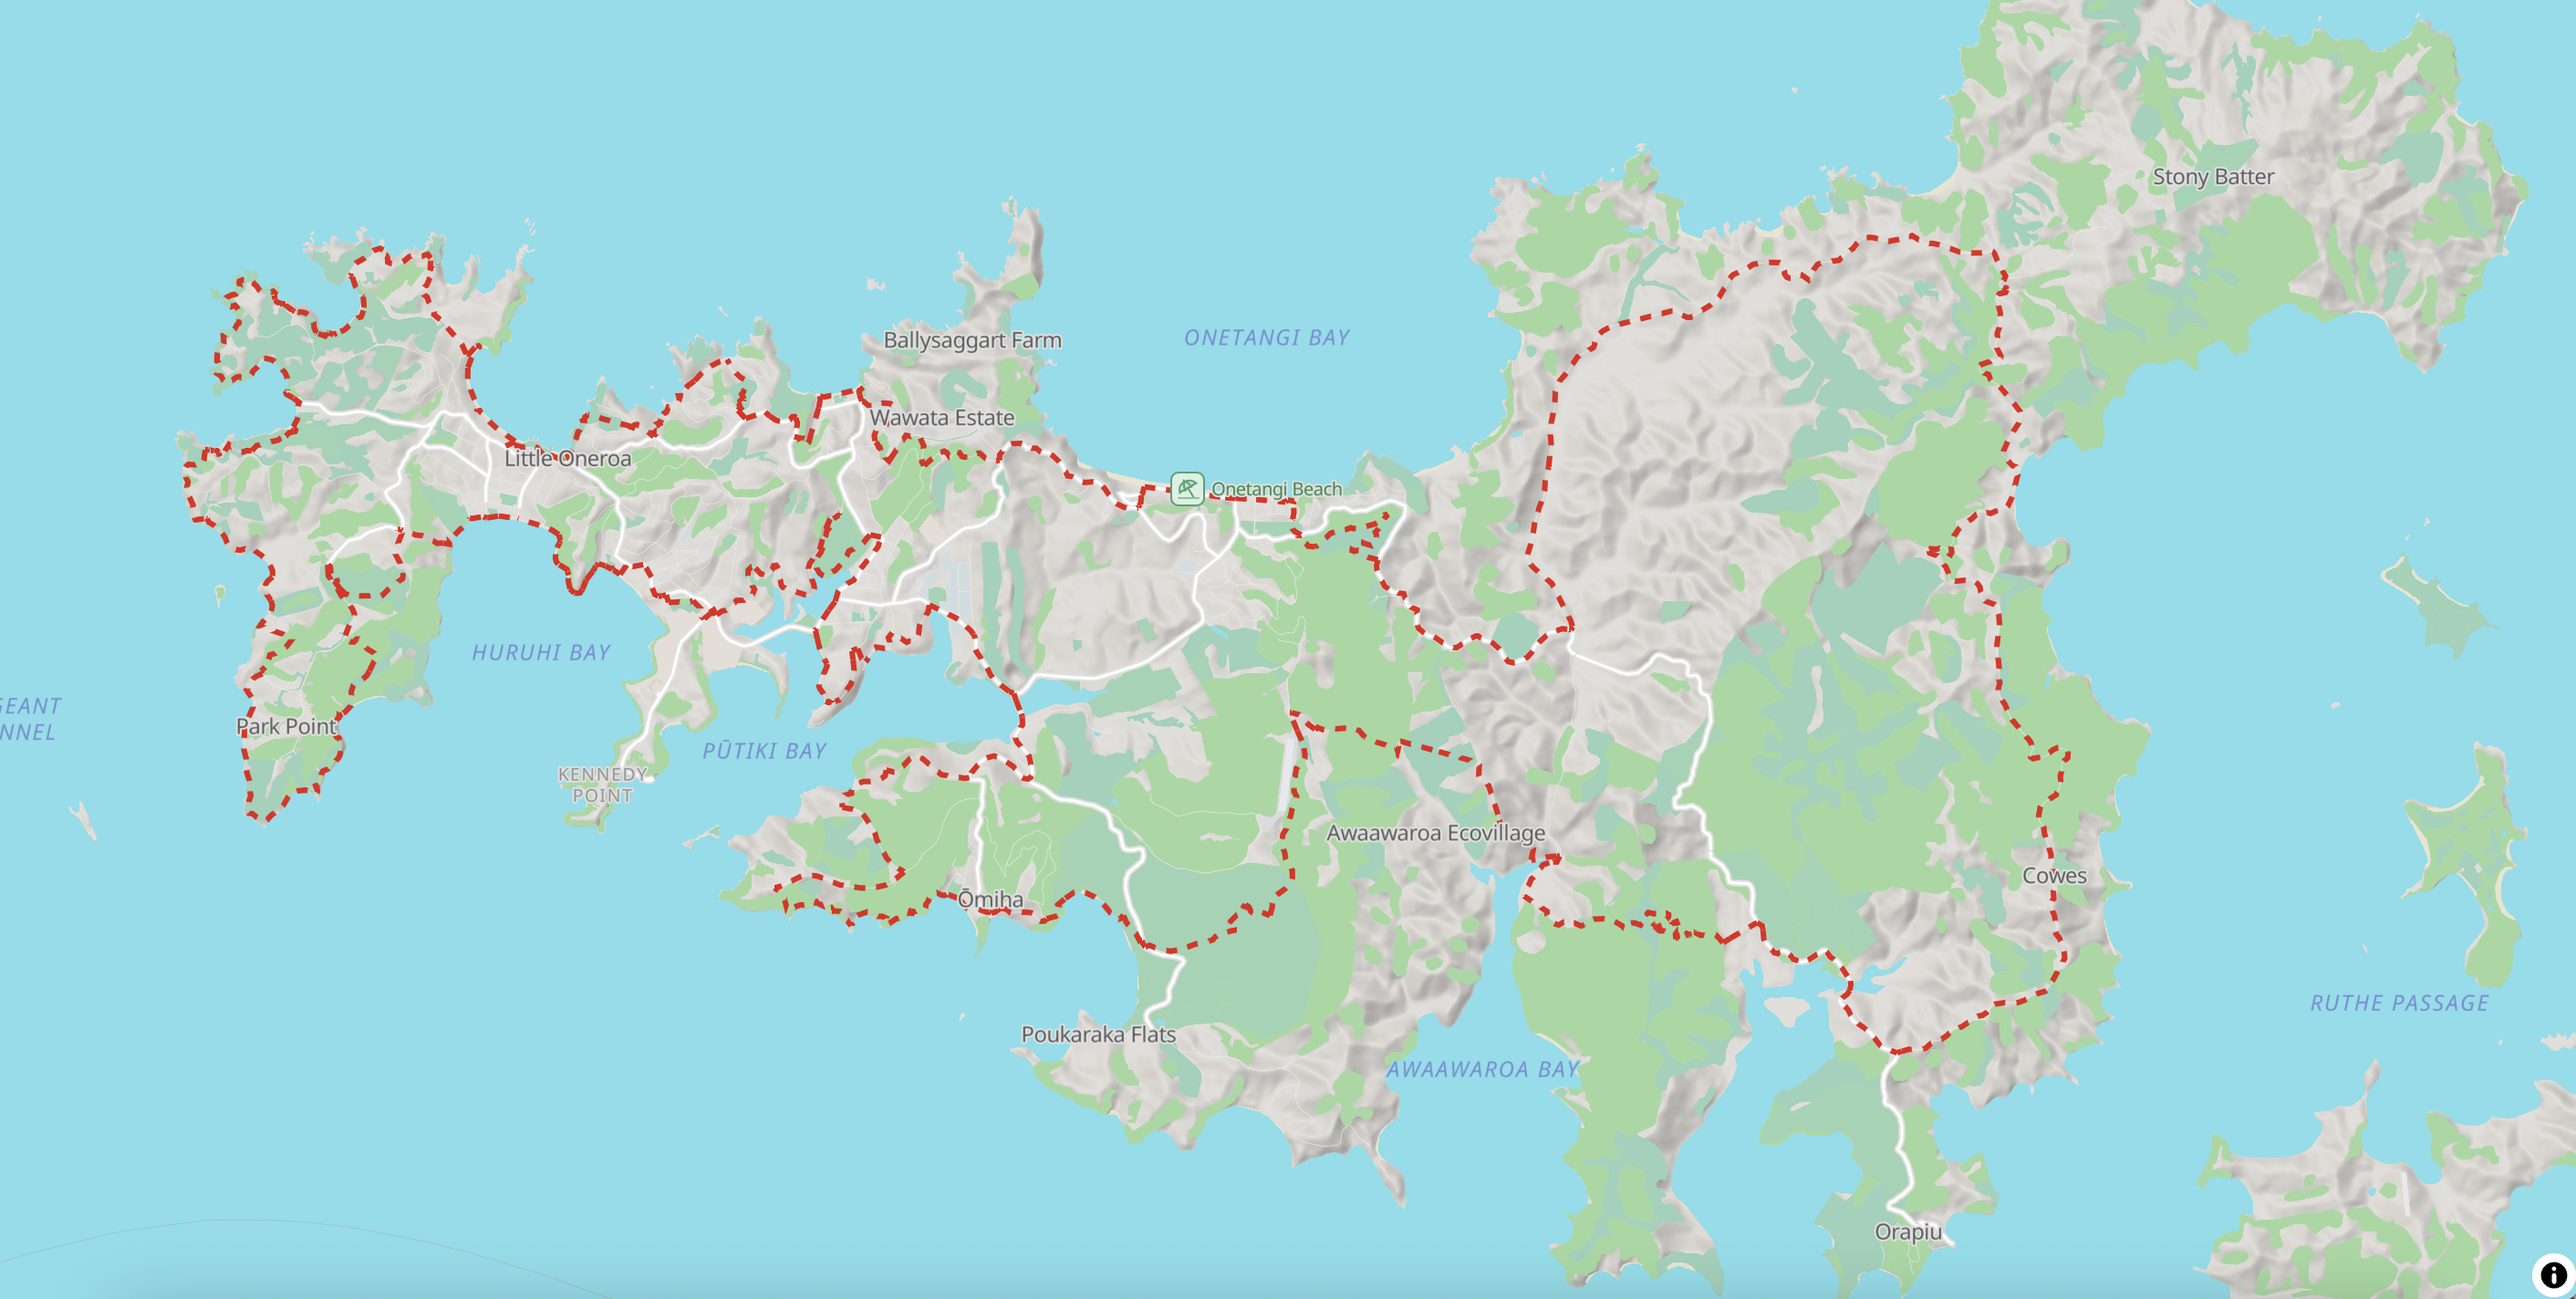
This is what your map should look like when you view it locally and via your GitHub Pages website